How to compile Redot Engine
A Guide on Compiling the Redot Engine

Platforms
In today’s guide we will go over compiling Redot Engine for:
- Windows
- Linux
We will not be going over:
- Compiling for Android
- Compiling for Mac
- Cross-compiling
Refer to the Redot Documentation to find out how you can build Redot for the desired platform or how to cross platform compile.
Compiling for your platform
Click below on any of the following links to figure out how to compile for out platform:
Building for Windows
Prerequisites
1. Getting a C++ compiler
- Download and install Visual Studio Community.
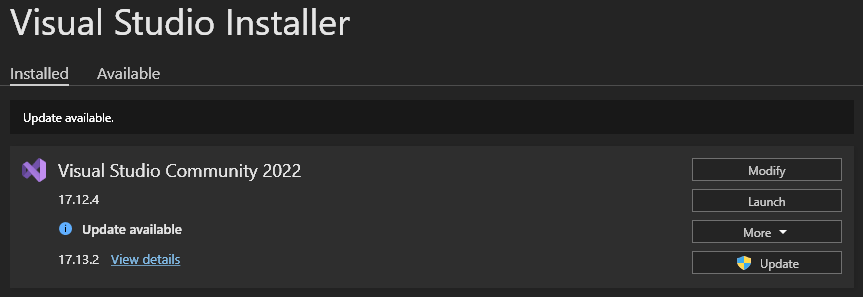
- Run the setup and open the Visual Studio Installer.
- Download the latest version of Visual Studio Community available to you.
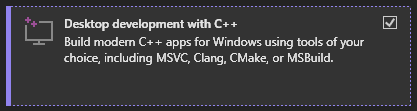
- In the Installing… prompt, select the following option.
- If you already have Visual Studio installed, don’t panic, you can modify your current installation to have the required modules.
- Open Visual Studio Installer from Windows Search
- Click on “Modify”:
-
Now select the module:
- Click on “Modify”:
- Now hit “Install” or “Modify” depending on your case. This will go ahead and install the required modules.
This will also install Visual Studio on your PC. There are alternative compilers that can be used to compile by which you can circumnavigate installing Visual Studio on your PC.
2. Install Python.
- Download and install Python 3.8+.
Make sure to enable
Add to PATHin the python installer dialogue.
- Open the windows terminal.
- Run
python --versionand check if it gives you an output like:1 2
$ python --version Python 3.13.2
- If it does not, you might need to troubleshoot. I suggest the following wonderful articles on the subject:
- If it does work, run
pip --version.You should get an output like this:1 2
$ pip --version pip 25.0.1 from C:\Users\USERNAME\AppData\Roaming\Python\Python313\site-packages\pip (python 3.13)
- If you don’t get this output, consult Installing PIP.
- Once both are done, proceed.
3. Install SCONS
- Download and install
SCons. This is the build system Redot uses, and makes it very easy to compile the source code. - To install
SCons, open a new windows terminal and type:1
$ python -m pip install SCons
If you had followed the previous steps to install python properly, this command would install
SConsbuild system for you. - After it’s installed, run:
1 2 3 4 5
$ SCons --version SCons by Steven Knight et al.: SCons: v4.8.1.08661ed4c552323ef3a7f0ff1af38868cbabb05e, Tue, 03 Sep 2024 17:46:32 -0700, by bdbaddog on M1Dog2021 SCons path: ['C:\\Users\\USERNAME\\AppData\\Roaming\\Python\\Python313\\site-packages\\SCons'] Copyright (c) 2001 - 2024 The SCons Foundation - If you don’t see that output, or get some error refer to Installing SCons
- If there is no error, congratulations! You have just finished the prerequisites. Let’s continue.
Getting the source code
- Getting the source code is pretty simple. There are 3 ways to download it onto your computer.
Downloading the source code as a zip file is not recomended since it is much easier to update the files later through the other methods
- Here’s how to download the source code (all methods):
- Downloading zip.
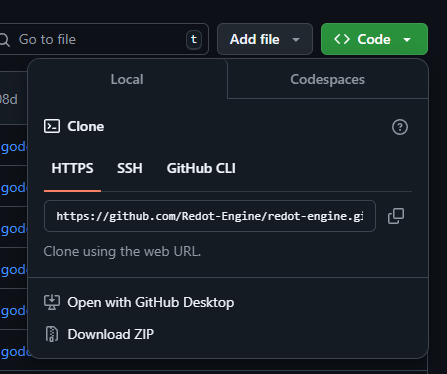
- Go to the Redot Engine Repository
- Click on “Download ZIP”:
- Note the path of the extracted files as it is required later.
- Downloading via Git:
- Install Git
- Open a windows terminal
- Run the following command:
1
winget install Git.Git
- If prompted type
Yfor yes, and follow through on any installer that may pop up.
If this doesn’t work for you, go and download Git from its official website, then run the setup and install it on your computer.
- Once Git is installed, run the following command in the window terminal:
1
git clone https://github.com/Redot-Engine/redot-engine
- This is make a local copy of the source code on your machine in a folder called
redot-engine. - Remember the path of this folder since we need to come back to this when we are going to build the engine.
- Install Git
- Downloading via Github Desktop:
- Download and install Github Desktop
- Sign in with your Github Account, Sign Up if you don’t have one.
- Click on Clone Repository.
- Go to URL tab.
- Search for
Redot-Engine/redot-engine, select a folder on your computer and clone it. - Note this path as we will be comming back to this later.
- Downloading zip.
Building from Source
Finally we are prepared to build the files. Open the folder where the Redot Engine source code is cloned, and follow through.
- Type
lsin your terminal and hit enter. You should see something like this.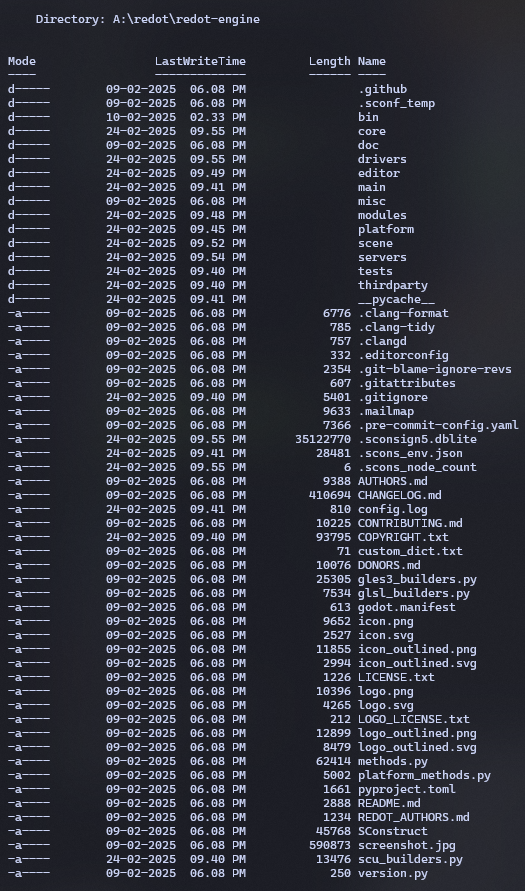
- If you see a different folder structure, you might be in the wrong directory and none of the following commands would work. Make sure you get the path right. Revisit Getting the source code if need be.
- Once confirmed, generating the binary files is as easy as running:
1
scons platform=windows
- Compilation will take some time depending on your hardware, CPU usage will touch 100%, don’t panic its normal. Ideally your computer wouldn’t freeze, make sure to close any other high demand applications before compiling.
- Once compiled you will find the binaries in the
binfolder.
Compiling the Export Templates
On windows, to generate the export templates for windows, run:
1
2
3
4
5
6
 scons platform=windows target=template_debug arch=x86_32
 scons platform=windows target=template_release arch=x86_32
 scons platform=windows target=template_debug arch=x86_64
 scons platform=windows target=template_release arch=x86_64
 scons platform=windows target=template_debug arch=arm64
 scons platform=windows target=template_release arch=arm64
Run only the set of commands you require.
CONGRATS! You have succesfully compiled Redot Engine for your computer, enjoy! For updating the source, see below.
Updating the source code
- If you had used a zip file for the source code initially, you have no option, but to revisit the github repository of the Redot Engine.
- If you have used Github Desktop.
- Open Github Desktop
- Click on Fetch Origin
- Click on Pull Origin
- This is clone the remote files onto your machine
- Now open the folder of the repository
- Run:
1
scons platform=windows
to recompile the binaries.
- If you have use Git.
- Open the repository folder in windows file manager.
- Right Click in an empty area and click on
Open in Terminal - Once in terminal, run:
1
git fetch
- After that run:
1
git pull
- This will go ahead and clone the updates made to the repository onto your computer.
- Run:
1
scons platform=windows
to recompile the binaries.
If you don’t see any thing on running
git fetchthat means the repository didn’t have an update. Runninggit pullafter that will outputAlready up to date.
Building for Linux/BSD
I am using Linux Mint. If you are using any other distro and facing some trouble, leave a comment. Or check the Official Documentation
Prerequisites
Since there are a lot of linux distros click on the one corresponding to you and execute the command in your terminal.
- Ubuntu/Debian
- Alpine Linux
- Arch Linux
- Fedora
- FreeBSD
- Gentoo
- Mageia
- NetBSD
- OpenBSD
- openKylin
- openSUSE
- Solus
1. Ubuntu/Debian
Run:
1
2
3
4
5
6
7
8
9
10
11
12
13
14
15
16
sudo apt-get update
sudo apt-get install -y \
  build-essential \
  scons \
  pkg-config \
  libx11-dev \
  libxcursor-dev \
  libxinerama-dev \
  libgl1-mesa-dev \
  libglu1-mesa-dev \
  libasound2-dev \
  libpulse-dev \
  libudev-dev \
  libxi-dev \
  libxrandr-dev \
  libwayland-dev
2. Alpine Linux
Run:
1
2
3
4
5
6
7
8
9
10
11
12
13
14
apk add \
  scons \
  pkgconf \
  gcc \
  g++ \
  libx11-dev \
  libxcursor-dev \
  libxinerama-dev \
  libxi-dev \
  libxrandr-dev \
  mesa-dev \
  eudev-dev \
  alsa-lib-dev \
  pulseaudio-dev
3. Arch Linux(btw)
Run:
1
2
3
4
5
6
7
8
9
10
11
12
13
14
pacman -Sy --noconfirm --needed \
  scons \
  pkgconf \
  gcc \
  libxcursor \
  libxinerama \
  libxi \
  libxrandr \
  wayland-utils \
  mesa \
  glu \
  libglvnd \
  alsa-lib \
  pulseaudio
4. Fedora
Run:
1
2
3
4
5
6
sudo dnf install -y \
  scons \
  pkgconfig \
  gcc-c++ \
  libstdc++-static \
  wayland-devel
5. FreeBSD
Run:
1
2
3
4
5
6
7
8
9
10
11
pkg install \
  py37-scons \
  pkgconf \
  xorg-libraries \
  libXcursor \
  libXrandr \
  libXi \
  xorgproto \
  libGLU \
  alsa-lib \
  pulseaudio
6. Gentoo
Run:
1
2
3
4
5
6
7
8
9
10
11
12
emerge --sync
emerge -an \
  dev-build/scons \
  x11-libs/libX11 \
  x11-libs/libXcursor \
  x11-libs/libXinerama \
  x11-libs/libXi \
  dev-util/wayland-scanner \
  media-libs/mesa \
  media-libs/glu \
  media-libs/alsa-lib \
  media-sound/pulseaudio
7. Mageia
Run:
1
2
3
4
5
6
7
8
9
10
11
12
13
sudo urpmi --auto \
  scons \
  task-c++-devel \
  wayland-devel \
  "pkgconfig(alsa)" \
  "pkgconfig(glu)" \
  "pkgconfig(libpulse)" \
  "pkgconfig(udev)" \
  "pkgconfig(x11)" \
  "pkgconfig(xcursor)" \
  "pkgconfig(xinerama)" \
  "pkgconfig(xi)" \
  "pkgconfig(xrandr)"
8. NetBSD
Run:
1
2
3
pkg_add \
  pkg-config \
  py37-scons
If you want audio support, also get
pulseaudio.
9. OpenBSD
Run:
1
2
3
4
pkg_add \
  python \
  scons \
  llvm
10. openKylin
Run:
1
2
3
4
5
6
7
8
9
10
11
12
13
14
15
16
17
sudo apt update
sudo apt install -y \
  python3-pip \
  build-essential \
  pkg-config \
  libx11-dev \
  libxcursor-dev \
  libxinerama-dev \
  libgl1-mesa-dev \
  libglu1-mesa-dev \
  libasound2-dev \
  libpulse-dev \
  libudev-dev \
  libxi-dev \
  libxrandr-dev \
  libwayland-dev
sudo pip install scons
11. openSUSE
Run:
1
2
3
4
5
6
7
8
9
10
11
12
13
14
15
sudo zypper install -y \
  scons \
  pkgconfig \
  libX11-devel \
  libXcursor-devel \
  libXrandr-devel \
  libXinerama-devel \
  libXi-devel \
  wayland-devel \
  Mesa-libGL-devel \
  alsa-devel \
  libpulse-devel \
  libudev-devel \
  gcc-c++ \
  libGLU1
12. Solus
Run:
1
2
3
4
5
6
7
8
9
10
11
12
eopkg install -y \
  -c system.devel \
  scons \
  libxcursor-devel \
  libxinerama-devel \
  libxi-devel \
  libxrandr-devel \
  wayland-devel \
  mesalib-devel \
  libglu \
  alsa-lib-devel \
  pulseaudio-devel
Before we proceed
Make sure you have
gitinstalled. If not install it from your package manager. e.g, on Ubuntu/Debian runsudo apt install git.
Building the Engine
- We are going to be using
gitto get the source code from github. - Run:
1
git clone https://github.com/Redot-Engine/redot-engine.git
- This clones the repository on your local drive, now run:
1
cd redot-engine
- We are now in the Redot Engine Folder, now run:
1
scons platform=linuxbsd
- The compiled binary files would be located in the
binfolder.
CONGRATS! You have succesfully compiled Redot Engine for your Linux, for updating the source code and binaries, see below.
Building the export templates
- To build the export templates, run:
1
2
scons platform=linuxbsd target=template_release arch=x86_64
scons platform=linuxbsd target=template_debug arch=x86_64
To build for 32 bit systems:
1
2
scons platform=linuxbsd target=template_release arch=x86_32
scons platform=linuxbsd target=template_debug arch=x86_32
Updating the source code
- In the directory in which the github repository is clone run:
1
git fetch
- Then run:
1
git pull
- This will download the latest version of the source code onto your device.
- To rebuild the binaries, simply run:
1
scons platform=linuxbsd
Conclusion
That is it, you should now have setup a working repository clone on your computer that can be updates, and the binaries can be built. Remember, using the cutting edge comes with a cost, and that is stability, and bugs. If you face any bugs make sure to make a report on the Github Repository for for Redot. If you want to learn more about the engine I highly suggest you to check out The Official Documentation. It will help you a lot.
That’s all, Keep Coding!